.
So I’ll get the formalities out of the way first and say that if anybody is interested in collecting the Spanish Civil War at Sea collection, then you can find it at this address: https://bayonetsandbrushes.co.uk/store/the-rif-spanish-civil-wars-at-sea/
Now then, let’s get down to the meat and gravy of the post.
.
Anybody that knows me, knows that I have a crippling fetish for collecting the weird, wonderful and obscure and when I start collecting… I have to have everything! The Spanish Civil War collection for Bayonets & Brushes is no exception and simply had to include land, air and sea!
.
Where the naval war was concerned, I was lucky in that at the time I was working with a really good artistic collective that were able to knock out the models at a reasonable cost and in a good timescale and as such I opted to do the whole lot as it fell within budget. I am also extremely fortunate in that Bayonets & Brushes is not my primary source of income and is more an outlet for my military fetishes and such I have both time and money to invest in artists building models for me which I then detail myself so that my ranges (and there quite a few more ranges on their way) have an aesthetic continuity across them. I have now also had the opportunity to paint the businesses prints and I have to admit to carrying a certain level of smugness with the way the detail carries the painting. I wont claim to being better than anybody else at painting BUT I will say that Bayonets & Brushes miniatures certainly assist in bringing whatever skills an artist has to the forefront.
.
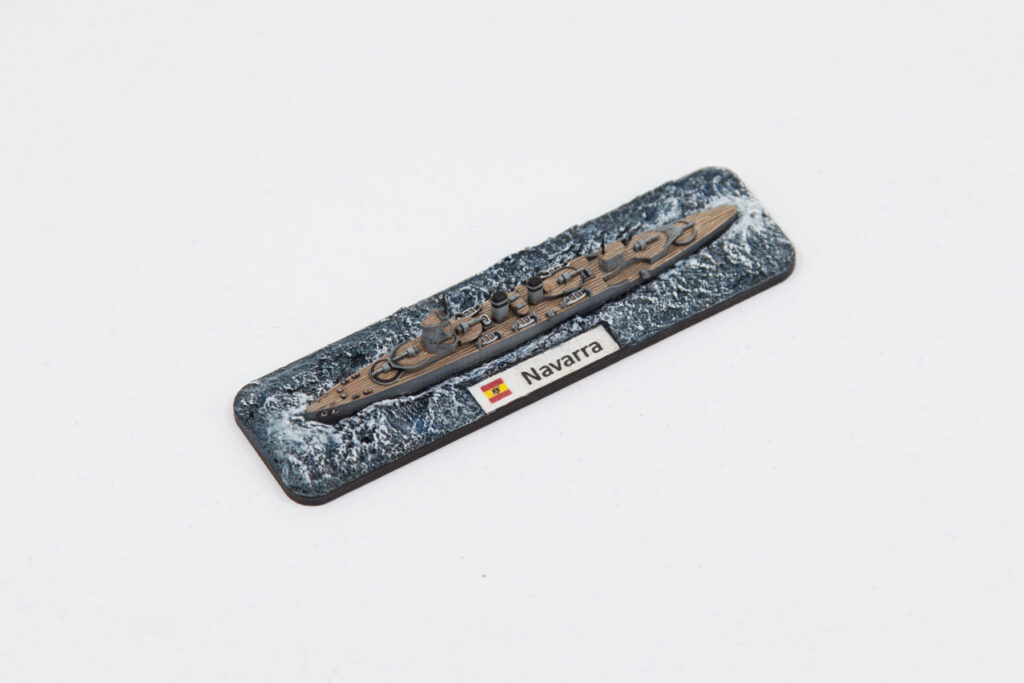
The Navarra is the first one that I painted from the naval range. So, let’s have a look at the history of the ship and then look at the painting and basing.
The Spanish government had approved a building program of cruisers in 1908 following the construction of the Espana class dreadnoughts and initially decided on three of the class.
.
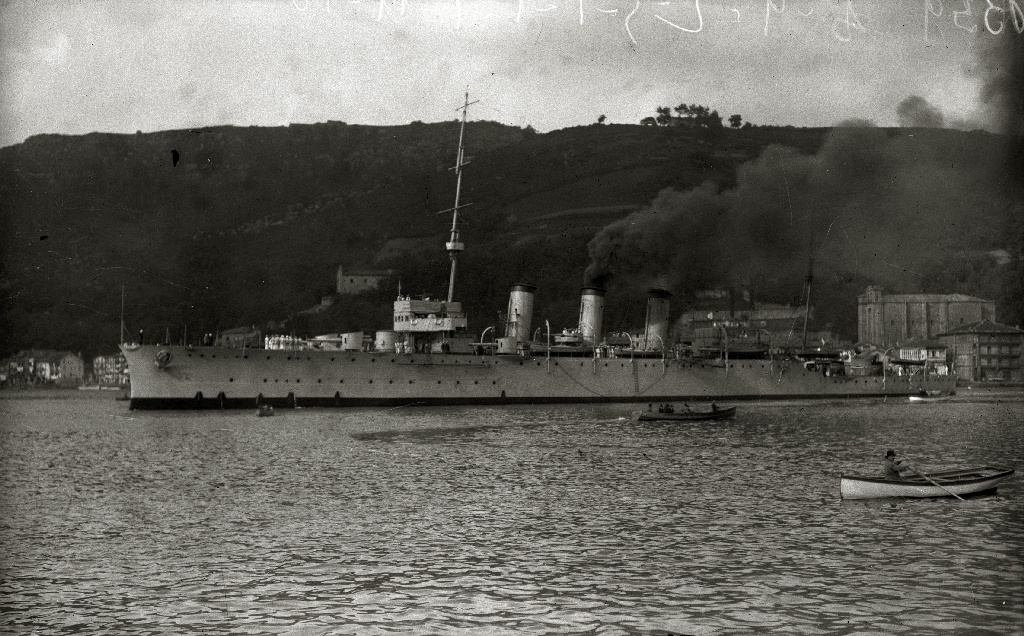
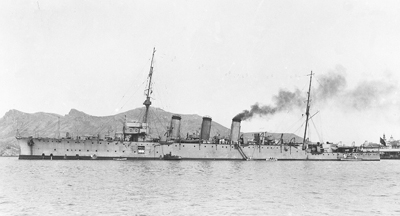
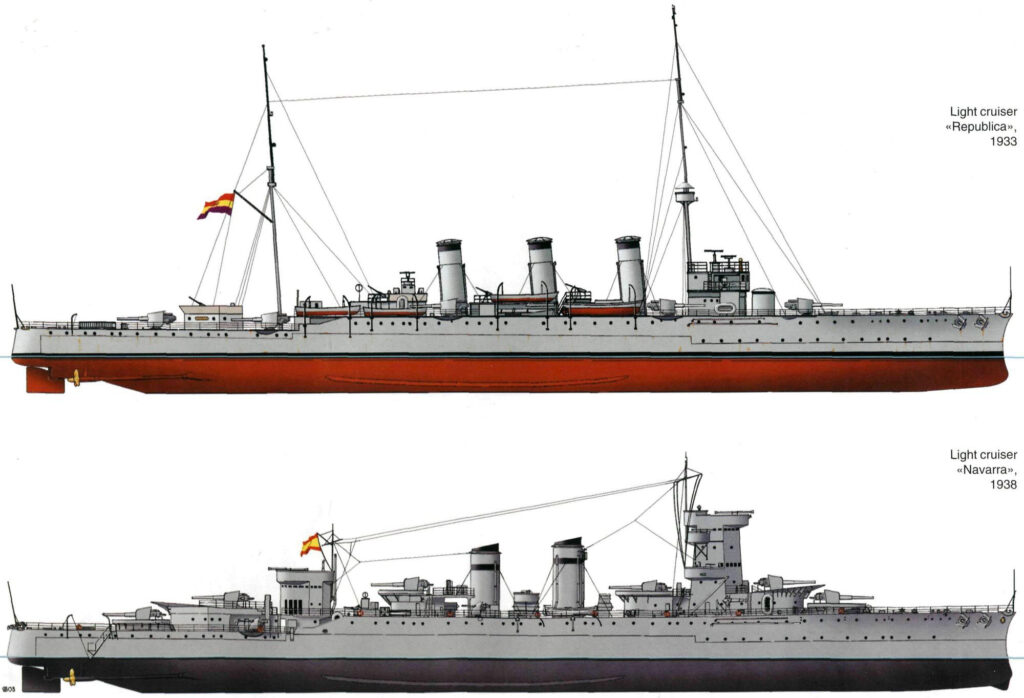
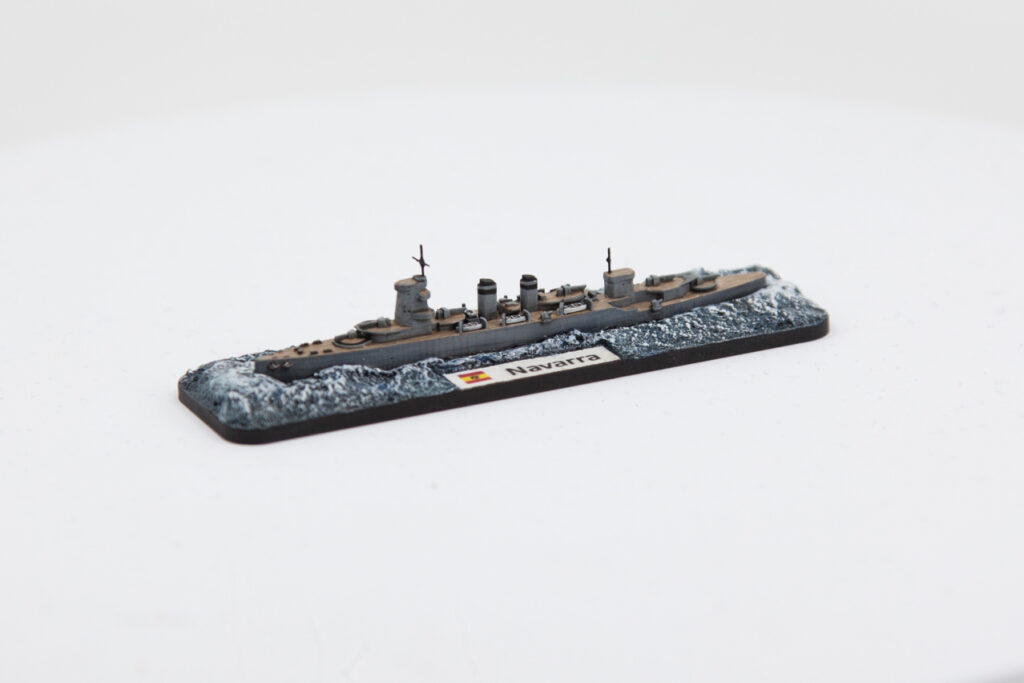
The Navarra’s keel was laid down in 1915 when she carried the name of her class Reina Victoria-Eugenia following much of the design principles of Great Britain’s Town Class Cruisers, which was decided in 1912 although one big structural change was that the boiler rooms were rearranged and separated to give the ship three funnels. Her launch was delayed from 1912 due to the outbreak of the First World War and the depended on provision of equipment such as artillery, telemetry and other equipment meant that she slipped her blocks only on 21st April 1920 and was finally completed and ready for service in 1923.
.
By this point however the Spanish admiralty declined to continue with building the other two in her class and instead were forced due to budgetry constraints to opt for smaller and more economical class of ship that became the Mendez-Nunez class. By 1924, when they were being launched they were already horribly obsolete.
Upon completion she served actively with the first cruiser division and in January 1925, accompanied by the destroyer Alsedo, she represented Spain in Lisbon at the IV Centenary celebrations of Vasco de Gama.
.
She became the flagship of the Spanish squadron that had been deployed as support in the North African Rif War.
With the deposition of Alfonso and the proclamation of the Second Spanish Republic the Reina Victoria-Eugenia was renamed República.
The start of the Spanish Civil War in 1936 found the República decommissioned and undergoing a major refit in Cádiz drydocks. The aging coal-fired boilers had been removed and she had been disarmed. Soon after the pronunciamento and the claiming of Cádiz for the rebels she fell into the hands of the Nationalists whilst still in drydock, bringing the refit to a halt.
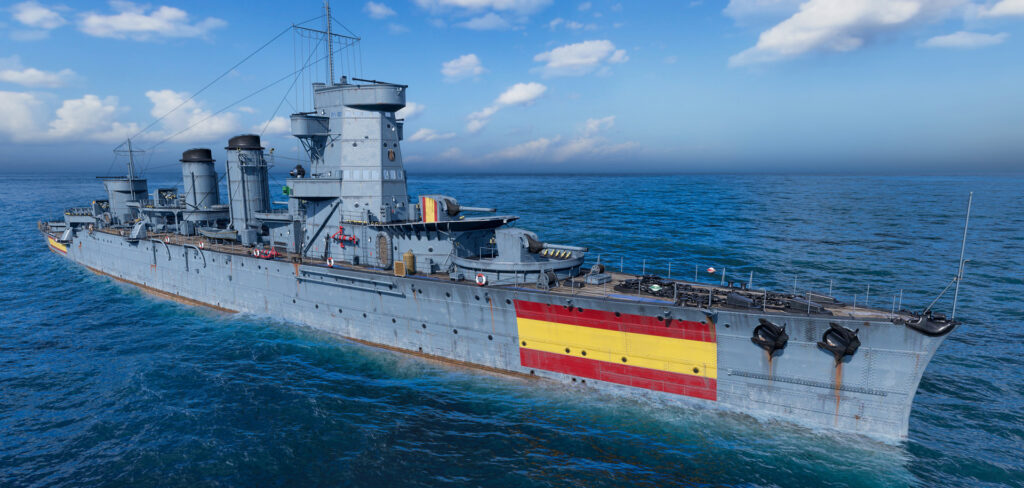
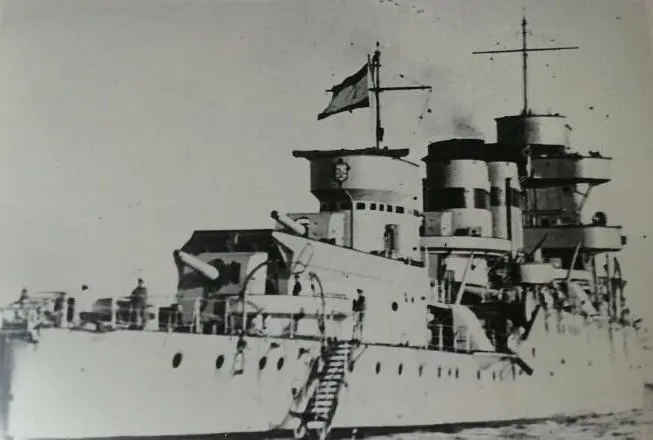
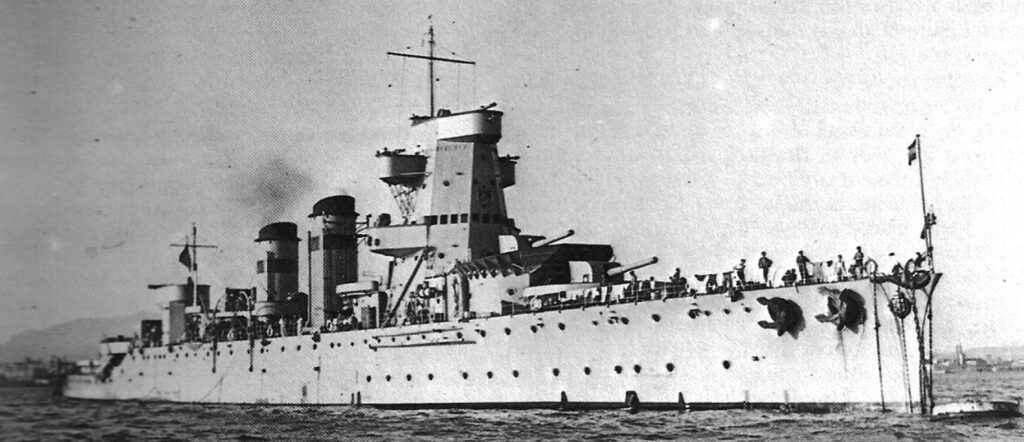
With the fall of Bilbao in June 1937 the possibilities of refitting this aged cruiser was again revisited. A project was presented to the Nationalist Naval Board and approved by SECN’s Ferrol Yard. She was quickly ordered towed from Cádiz to Ferrol where she arrived carrying the name Navarra and arriving in late July 1937 where work began in earnest with the removal of all of the upper superstructure to facilitate easier access to the machinery below decks.
.
.
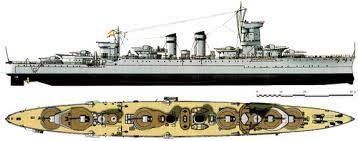
The refit officially began in late 1937 and was completed a few months into 1938. She received eight brand new Yarrow oil-fired burners which cost her one knot of speed but increased her range appreciably. She received a completely new and streamlined superstructure with shortened masts. She lost her torpedo tubes along with three of her 152mm guns, instead receiving six 152.4mm Vickers artillery pieces received from the coastal batteries of the Cantabrian Coast following the fall of the north. These were now all arranged down the middle of the ship forming a centreline grand battery, allowing their use to both sides. As a Fascist concession, four of the highly thought of German 8.8cm Flak 18’s were also supplied to serve as anti-aircraft defence, bolstered by an additional two twin Isotta-Fraschini Breda 20mm AA guns.
.
After the modernisation of Navarra her displacement rose from 5,502 long tons to 6,500 at full load. Her length increased from 134m to 140.8m with 15.2m beam and 5.6m draft. The armour remained unchanged with around 150cm around the battle bridge and conning tower whilst the armour belt which sat above the waterline consisted of around 76mm of steel, although it is uncertain what type of steel was used.
.
Sadly, the replacement of the boilers with oil-fired ones did not improve her performance and she soon gained the nickname Sigamos a la flota meaning ‘follow the fleet’, a satirical observation, as she was clearly the slowest of the other two Nationalist cruisers, Canarias and Almirante Cervera being left perpetually in their wake.
She took part in very little activity during the war owing to the timing of her overhaul other than sailing out of Ceuta with Canarias to attempt hunting down the Republican destroyer José Luis Diez attempting to break through the Nationalist net to Cartegena from the Atlantic there is little other recorded activity. She was a timely replacement for the loss of the Baleares in March 1938 though in the Nationalist Cruiser Division.
.
Commanding Officer José Ramón Carbonell Rubio noted in his journal:
“Aesthetically, the new Navarra left a lot to be desired. The heresy of her chimneys was not her only sin, but her horrible bridge, half Egyptian pyramid and half dovecote, reminiscent of the Graff Spee and the Canarias, worse in effect to both as it was not high enough to escape the infernal smoke from the new chimneys, permanently clouding the fire control.”
Her lack of efficiency, despite the root and branch modernisation meant that even following the Civil War conclusion in early 1939 the Navarra was mostly kept for training and in this capacity, she remained until May 1951.
She was finally auctioned off and scrapped in 1956.
.
.
So, there we have it, the history of a grand old dame who was at least able to provide some service…
Now let’s look at one possible painting and basing scheme for this ship!
Now I’ve been collecting and painting for almost 4/5’s of my life and as such I have an enormous variety of paints (even though I probably only use 3 or 4 of them!) so my painting schemes usually cover a whole gamut of different manufacturers paints. My advice here would be if you can’t get access to the exact match just choose something as close as you can find!
.
.
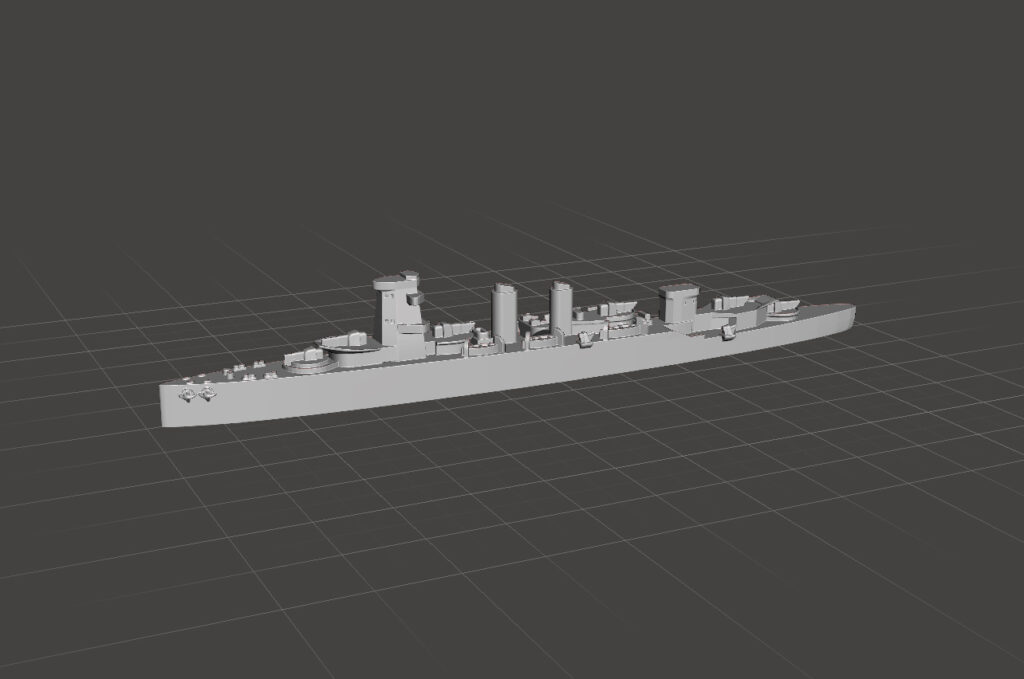
Modelling the Navarra
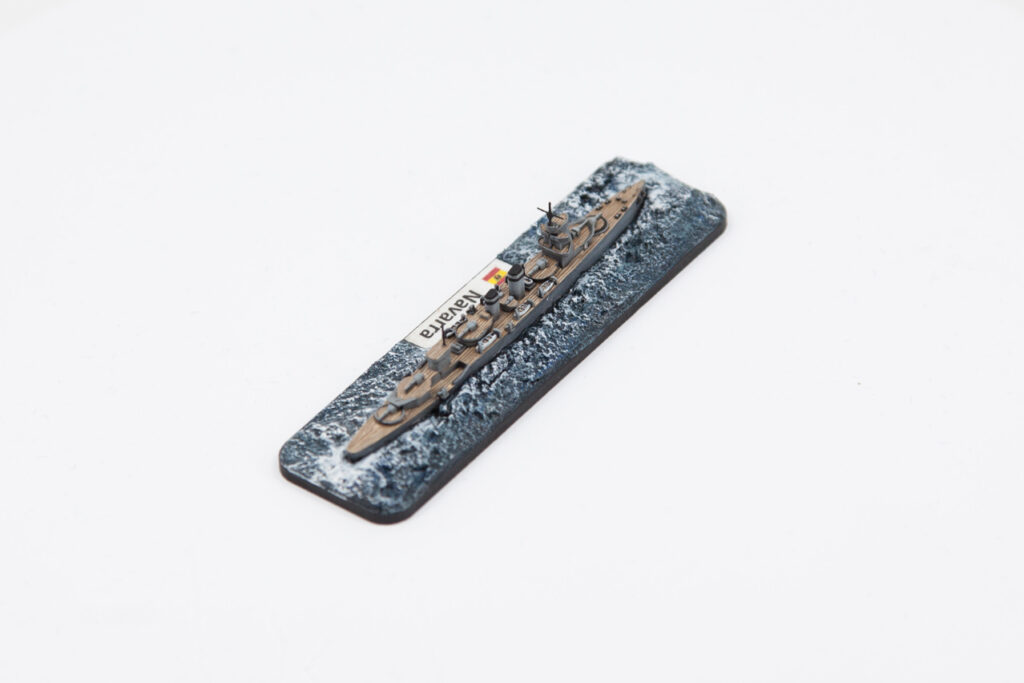
Vessels of this size are rarely provided with masts and as such I like to make my own. I opted to use guitar string for my masts as they have incredible tensile strength, accept solder easily and come in a massive variety of different sizes. For a cruiser of this size I opted for a size 11 string for the masts themselves and size 8 string for the spars. Placing them crossways, braced against each other by whichever method you deem most suitable I think solder them in place. The excess us then clipped off and the masts are drilled and installed into the body of the ship.
.
.
Painting the Navarra
- Prime the model black. I always do this because I like the deep tones that the primer lends to the paint that goes over the top.
- Spanish naval vessels had a uniform mid grey colour that they were painted in, and that was a colour scheme that was retained by both sides throughout the conflict. To achieve this, I slap on a decent coat of S.C.C14 Blue Black by AK Interactives Real Colours all over the model. I then conduct an azimuth airbrushing with Bluish Grey by Scale 75’s Drop Paint. Following this I pick out the details by brush using Dark Blue Grey by Vallejo Model Color 904. This is the main basic colour finished so now its time to start adding some convincing tones. To enable this, I first paint the model in a Satin Varnish. Doesn’t really matter what make so long as its not a matt varnish. Once completely dry I mix Games Workshops Nuln Oil and Agrax Earthshade in a 50/50 mix which is then diluted 70/30 with water (the water being the 70%). This is then slapped liberally over the model and left to dry. The final step of the hull colouring is to once again pick out the most exposed areas once again with the same Dark Blue Grey used before.
- The wooden decks, I believe is where a real difference can be made in making a naval model aesthetically attractive. IF you can’t find which parts of the deck are armoured and which are planked then I would personally choose to just plank the lot as its just so attractive if it’s done properly. In lieu of any armoured decking information I cover all decking, bridges and superstructure roofs with a base colour of US Field Drab by Vallejo Model Color 873. With a careful hand I then proceed to paint long stripes in the direction of the planking in Cork Brown by Vallejo Model Color 843 with the stripes all painted close up alongside each other and gathering in towards the central planking line at the stern of the vessel. I think go over the stripes again in their most exposed or highlighted positions with Iraqi Sand by Vallejo Model Color 819.
- Now its time to start picking out the details. Firstly, is the funnel tops and the masts. As a Nationalist vessel the Navarra sported a black cap on each of the funnels and a single black stripe a little further down. The masts were also painted in the same black.
- The lifeboats were then addressed. The top of each of the lifeboats was painted in exactly the same methodology as the decks of the ship. Black by Vallejo Model Color 950 was then used to pick out the lifeboats from the deck and to mark in the bench seating inside the boat. Finally, I used Ivory by Vallejo Model Color 918 to pick out the sides of the boats and the bench seats, taking care to leave a very thin black edge to both lifeboat and bench seating.
- Finally, I addressed the metal elements such as the anchors and bollards basing them out firstly in the same black used above and then picking them out in Heavy Armour by N-Paint Metal NA54
- To protect your model, paint it with a super matt varnish. It can be any make but personally I use Army Painters Super Matt Varnish. Their spray cans can barely last a day without clogging, no matter what techniques you use BUT their 15ml bottles can work as a stopgap. That’s it! Done… and you should have a beautiful model in hand… but not yet based!
.
.
Basing the Navarra
- Warlord Games Victory at Sea based ships are great if you want a lazy option but I just don’t think they look very good, and at this scale the base of a model is almost as critical if not more critical to the overall aesthetic of a model. Bearing this in mind I decided that I needed to make my own bases. Fortunately, my Russo-Japanese War collection all had the same bases made for them so I decided to see if I could upscale and still keep the model’s appearance convincing. First you need to get your bases. I use MDF and for a model the size of the Navarra I opted for a 90mm x 25mm base with rounded corners. The base was cross scored in order to provide a key for the basing materials to make it more stable.
- Each of my ships in the SCW fleets has had their names printed with the relevant flag alongside the name. This was cut out and then stuck to the edge of the base which had been painted in its entirety in PVA glue. Once dry the label area at the very least was overpainted with another layer of PVA glue to ensure that the label doesn’t lift in the following steps for any reason.
- A layer of tile grout is then applied liberally all over the base except for where the label is situated. Don’t worry if you overlap slightly as once its dry a sharp scalpel with a perpendicular blade can be used to clean this up.
- Once the grout has been left to cure until its tacky an old toothbrush is used to stipple the surface of the grout pulling it so that it looks like the choppy surface of the sea.
- At this point the model is pushed down into the grout from the back of the base and pushed forwards slightly taking care not to dig too deeply into the grout in order to push the grout up in front of the ships bow and so it is pushed out from the sides of the ship. Once done remove the ship and clean any stray grout away from the hull of the ship. Leave to completely cure.
- Once completely cured slice away any grout overlapping the label using a scalpel.
- Prime the base by completely covering it with black. Its only a primer label so use whichever paint you choose.
- Paint the whole base in a base coat of Dark Sea Blue by Vallejo Model Color 898
- Once dry stipple the surface with Prussian Blue by Vallejo Model Color 965 taking care that it is done in patches with the Prussian Blue patches gathered on the high points of the base.
- The entire surface of the base is then given a moderate drybrush with US Blue Grey Pale by Vallejo Model Color 904.
- A lighter drybrush is then applied with a white paint. Not important which one so long as its white and pure.
- Glue the ship onto its base in the hull shaped hole that you created.
- This same white is then used to pick out the crests of the waves, the wake behind the ship and to create a softer white area in front of the ship itself where the bow creates froth.
- The base itself is now given a very gloss varnish in order to make it as reflective as possible.
- Edge the base black (or whichever colour you would rather use).
.
.
…and that ladies and gentlemen is how I go about painting my ship models Feel free to share your images of your ships as we are always interested in new techniques that we can use in our own modelling endeavours.
.